How to Draw a Leader Autocad
AutoCAD 2015 and AutoCAD LT 2015 Bible
The most comprehensive AutoCAD book around!


Create stylish leaders with a multileader style
 If you use leaders, you should consider creating a style. Once you save the style, you can use it whenever you need a leader.
Here are the steps to create a multileader style:
- Go to Home tab, Annotation panel and click the down arrow to expand the panel. Click the Multileader Style icon to open the Multileader Style Manager dialog box.
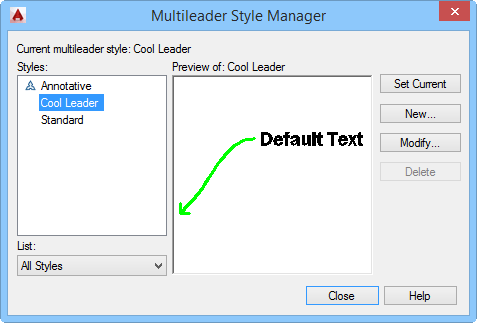
- Click the New button to open the small Create New Multileader Style dialog box. Type a new style name and choose an existing style to start with. You can choose to make the style annotative by clicking the Annotative checkbox. Click Continue. The Modify Multileader Style dialog box opens, showing the name of the style that you specified. This dialog box has 3 tabs.
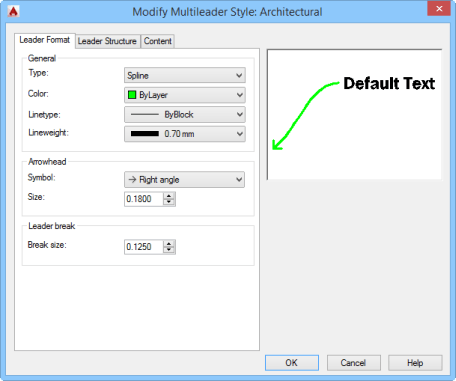
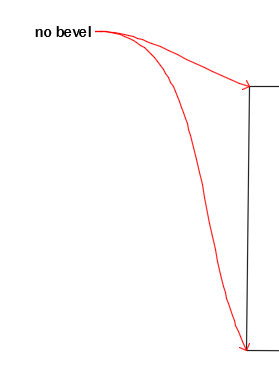
- On the Leader Format tab, specify the leader type (Straight, Spline, or None).
- Choose a color. The default is ByBlock — the leader takes on the color of the current layer — or the current color.
- Choose a linetype. If you don't see the linetype you want, choose Other from the Linetype drop-down list to open the Select Linetype dialog box.
- Choose a lineweight from the Lineweight drop-down list.
- In the Arrowhead section, choose a symbol (arrowhead type) and size. The one you see above is called Right Angle.
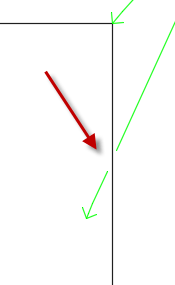
- The Break Size is the gap that is created when you use the DIMBREAK command — it sets the gap when the leader crosses another object. You can see an example on the right.
- Click the Leader Structure tab to specify points, angles, landing settings, and scale.
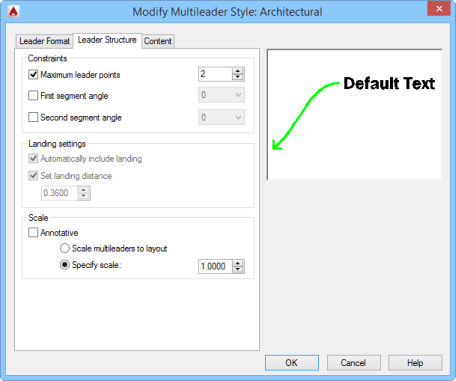
- Choose the maximum number of leaders points. In the example, I'm using a spline leader type, so you don't really see points, but usually a leader has 2 points, its arrow end and a bend point, which connects to the landing line (next to the text). You can add more if you want, but you can't have fewer than 2 points.
- You can set the first and second segment angles if you want to make sure that all leaders use the same angle. You can choose from 15, 30, 45, 60, and 90.
- You can set the second segment angle, too. This one is horizontal by default.
- In the Landing Settings section, you can choose to automatically include a landing (a short, horizontal segment that leads to the text) or not. The default is to include a landing. You can also set the landing distance, which is its length.
- Like a block, you can make a multileader annotative. (See my tip on annotative objects here.) In the Scale section you can check the Annotative checkbox and you can also specify a scale or automatically scale the multileader to the scale of a layout.
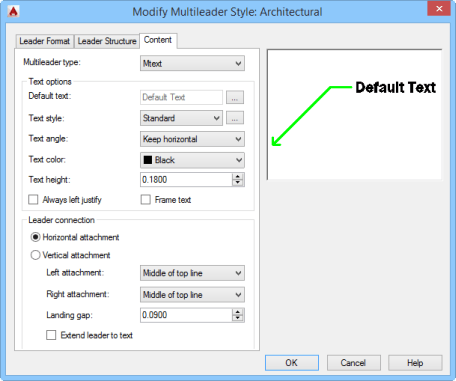
- On the Content tab, you specify options relating to text and the connection between the leader and the text. The Text Options section lets you set default text, a text style, the text angle, the text color, and the text height.
- In the Leader Connection section of the Content tab, you can choose a horizontal attachment (the default) or a vertical attachment. The vertical attachment is important when you may have more than one line of text. Do you want the landing line to go to the top line of text, the bottom line of text, or to the middle? Choose from the drop-down lists for left and right attachment.
- Finally, you can specify the gap between the landing line and the text or extend the leader to the text (no gap).
 How do you style your leaders? Leave a comment below!
- Author
- Recent Posts

Ellen Finkelstein is the author of the best-selling AutoCAD & AutoCAD LT Bible, which started with R14. Ellen has written extensively on AutoCAD, including articles for Autodesk's website and features for AutoCAD's Help system. Ellen's first book was AutoCAD For Dummies Quick Reference.
14 comments to Create stylish leaders with a multileader style
Draw faster and easier!
Top 25 Productivity Tips Every AutoCAD® User Should Know

Source: https://allaboutcad.com/create-stylish-leaders-multileader-style-2/
0 Response to "How to Draw a Leader Autocad"
Postar um comentário